Sous Vide Chicken Breast Recipe: The Foolproof Guide to Perfectly Juicy Chicken Every Time
How many disappointing chicken dinners have you endured? You follow the recipe meticulously, check the temperature religiously, yet somehow that chicken breast emerges from the oven dry, chalky, and utterly forgettable. You slice into it hopefully, only to find yourself chewing through what tastes like cardboard.
I lived in that frustrating cycle for years. Chicken breasts were either undercooked and concerning or overcooked and desert-dry. I tried every trick—brining overnight, pounding thin, cutting into smaller pieces—but results remained unpredictable. Cooking chicken felt like rolling dice, and I rarely won.
Then sous vide entered my kitchen, and everything shifted. That first chicken breast I pulled from the water bath, seared quickly, and sliced into actually made me pause mid-bite. The texture was revelatory—impossibly tender, uniformly cooked from edge to center, so juicy it seemed almost unreal. This wasn’t luck or advanced culinary skill. This was science doing the heavy lifting, producing the same perfect result every single time.
That breakthrough happened three years ago. I haven’t cooked chicken breast any other way since, not because I’m obsessive about perfection, but because this sous vide chicken breast recipe method is genuinely easier than traditional cooking while delivering superior results. No constant monitoring. No temperature guesswork. No anxiety about serving raw or rubbery protein to your family.
Whether you’re a sous vide veteran looking to master chicken or a skeptical beginner wondering if the hype is real, this guide will transform your approach to one of the most commonly ruined proteins in home cooking.
Table of Contents
Why Sous Vide Changes Everything
The Science That Solves the Problem
Chicken breast proteins start denaturing around 140°F. Traditional cooking methods—pan, grill, oven—all apply heat that far exceeds this temperature, creating an unavoidable gradient. The exterior cooks rapidly while you wait for the center to reach safety. By the time the middle hits 165°F, the outer layers have climbed well beyond that, squeezing out moisture and creating tough, dry texture.
Your sous vide chicken breast recipe eliminates this gradient entirely. Water heated to exactly 145°F surrounds the chicken completely, cooking every part at precisely the same rate. The exterior never exceeds 145°F, so it can’t overcook while waiting for the center. You achieve uniform cooking from edge to edge—something genuinely impossible through conventional methods.
Here’s what makes this even better: the USDA provides two pathways to safe chicken. Everyone knows the instant-kill temperature of 165°F. What fewer people realize is that lower temperatures become equally safe when held for specific durations. At 145°F, chicken is fully pasteurized after just 8.4 minutes. Most recipes call for 1.5 to 4 hours at this temperature, far exceeding safety requirements while maintaining incredible texture.
Consistency You Can Actually Rely On
Traditional cooking demands constant attention and experience. Is your pan hot enough? Too hot? How thick is this particular breast? Did you remember to take it out of the fridge early enough? Every variable affects the outcome, making consistent results frustratingly elusive.
A sous vide chicken breast recipe removes these variables. Set your temperature. Place your sealed chicken in the water. Walk away for anywhere from one to four hours. Within that window, your chicken reaches perfect doneness and stays there. It can’t overcook because the water never gets hotter than your target temperature. A distracted beginner gets the same result as an experienced chef.
This consistency transforms meal planning. Cook chicken on Sunday knowing it will be exactly as perfect on Thursday when you reheat it. Make dinner for guests without worrying whether you’ve timed everything perfectly. Feed picky kids who refuse anything even slightly overcooked. The anxiety disappears when results become predictable.
Equipment That Makes It Work
Your Essential Tools
You need three things for a successful sous vide chicken breast recipe: an immersion circulator, a container for water, and bags to seal your chicken. The immersion circulator heats and circulates water to maintain precise temperature. Entry-level models from brands like Anova or Inkbird start around seventy to one hundred dollars and work perfectly well for home cooking.
Your water container can be anything from a large stockpot you already own to a dedicated sous vide container with fitted lids. Deeper containers prove more efficient than wide, shallow ones—they heat faster and lose less water to evaporation during long cooks. A four-quart capacity handles two to four chicken breasts comfortably.
For sealing, you have options. Vacuum sealer machines create the most reliable seal and remove all air, but they represent an additional investment. Heavy-duty freezer bags work beautifully using the water displacement method—simply submerge the open bag slowly, letting water pressure push out air, then seal the top just above the waterline. This technique costs essentially nothing and works remarkably well.
The Finishing Touch
You’ll also want a heavy pan for searing—cast iron or carbon steel works best. After cooking, your chicken needs a quick, aggressive sear to develop that golden-brown crust and complex flavors. The chicken is already fully cooked, so you’re only creating surface texture and appearance. A smoking-hot pan for sixty to ninety seconds total does the job perfectly.
Your Master Recipe
This foundational approach produces consistently excellent results every time. Master this, and you’ll adapt it endlessly based on what’s in your pantry and what sounds good on any particular day.
Your ingredient list:
| Ingredient | Amount | Purpose |
|---|---|---|
| Boneless chicken breasts | 2 (6-8 oz each) | Main protein |
| Kosher salt | 1 teaspoon | Essential seasoning |
| Black pepper | 1/2 teaspoon | Freshly ground |
| Garlic powder | 1/2 teaspoon | Aromatic depth |
| Fresh thyme sprigs | 2-3 | Herbal notes |
| Butter | 1 tablespoon per breast | Richness |
| High-heat oil | For searing | Avocado or grapeseed |
Making it happen:
Fill your container with enough water to fully submerge your chicken bags. Attach your immersion circulator and set it to 145°F. This temperature creates the ideal balance between food safety and optimal texture—tender, juicy, with that familiar “cooked” appearance most people expect.
While the water heats—this takes fifteen to twenty minutes depending on volume—prepare your chicken. Pat the breasts completely dry with paper towels. Moisture prevents both good sealing and proper seasoning adhesion. Season both sides with salt, pepper, and garlic powder.
Place one or two breasts in each bag. Don’t crowd—they need water contact on all surfaces for even cooking. Add your butter and thyme sprigs. If using a vacuum sealer, follow your machine’s instructions. For zipper bags, use the water displacement method: lower the open bag into water slowly, letting water pressure push air out, then seal just above the waterline.
Once your water reaches temperature, submerge your sealed bags. Use clips or weights if they float. Now comes the remarkably easy part: walk away. Set a timer for ninety minutes as your minimum, but you have up to four hours of flexibility. Your chicken reaches perfect doneness at ninety minutes and stays there for hours without degrading.
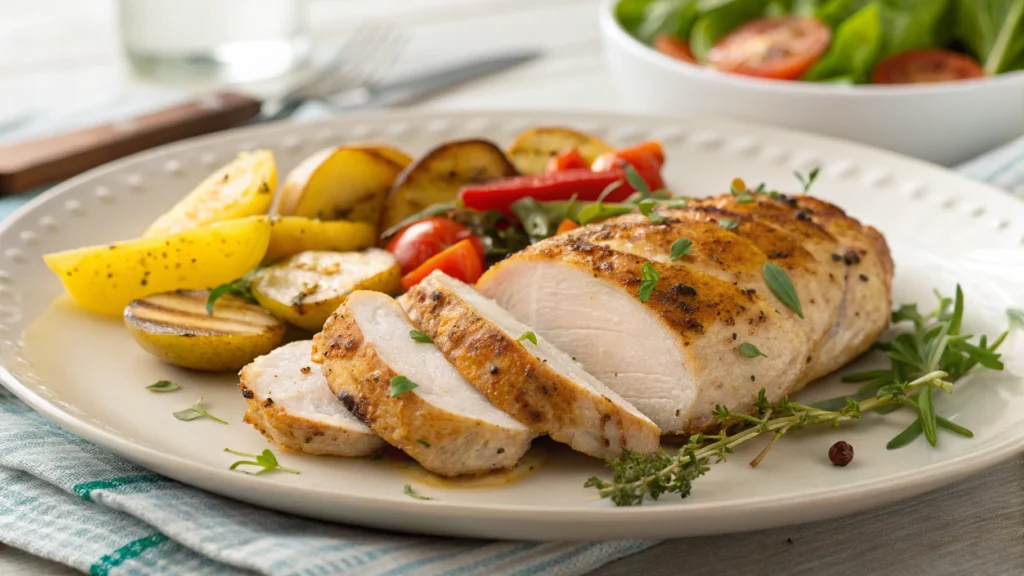
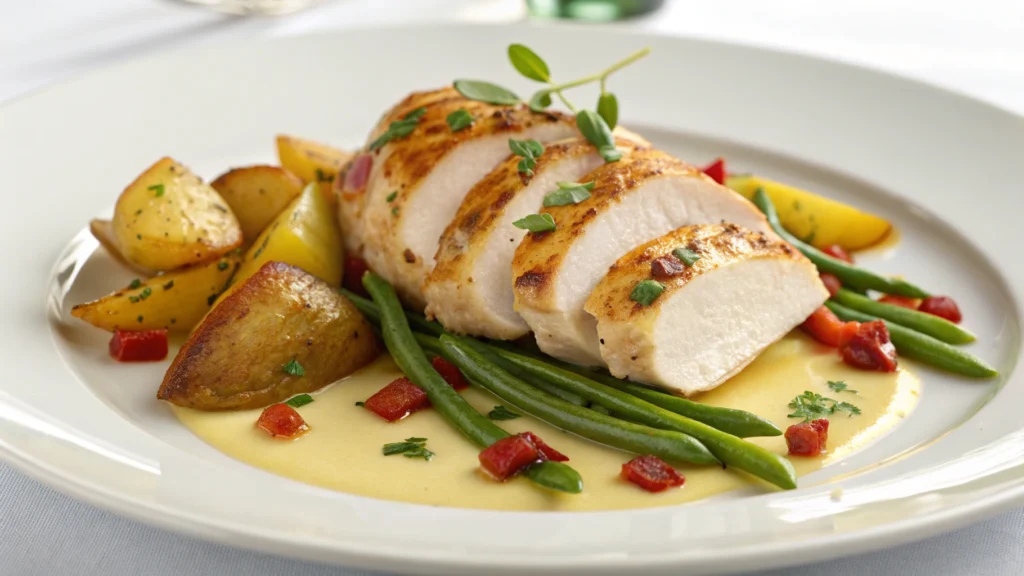
When ready to serve, remove bags from the water. Pat chicken breasts completely dry—this step is crucial for getting a proper sear. Heat your cast iron skillet over high heat until it’s smoking. Add a thin layer of high-smoke-point oil. Sear each breast for forty-five to sixty seconds per side. You’re just browning the surface, not cooking through.
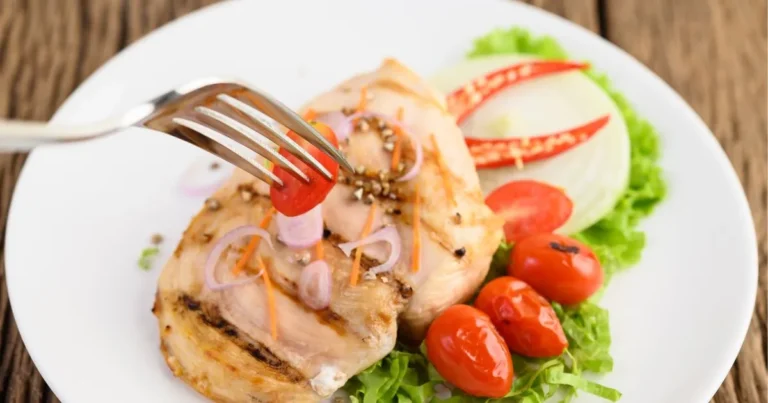
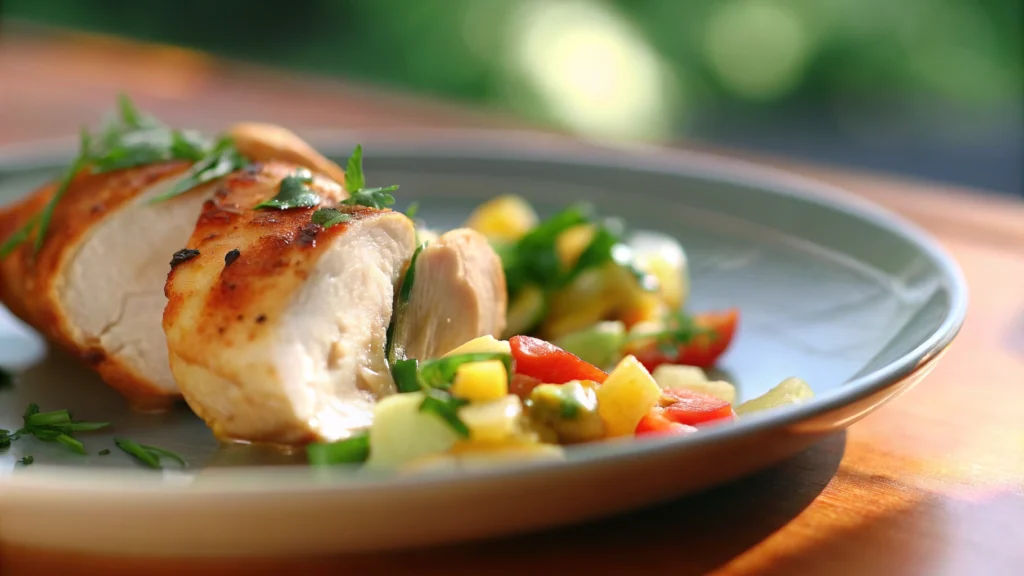
Let the chicken rest for a couple minutes, then slice and serve. When you cut into it, you’ll see uniform color from edge to edge—no gray, overcooked outer layer. The texture will be tender throughout, and the moisture content will be noticeably higher than any chicken breast you’ve cooked traditionally.
Temperature Choices and Their Effects
Finding Your Sweet Spot
The temperature you choose for your sous vide chicken breast recipe directly affects final texture. At 140°F, chicken becomes incredibly tender, almost soft, with a slightly translucent center even when fully safe to eat. This temperature takes some getting used to if you’re accustomed to traditional cooking, but it represents maximum tenderness.
At 145°F—my recommended starting point—you get tender, juicy chicken with a just-opaque appearance that looks familiar. This temperature produces what most people consider perfectly cooked chicken while maintaining exceptional moisture. It’s safe, delicious, and doesn’t challenge anyone’s expectations about what chicken should look like.
Moving to 150°F creates firmer texture that’s still noticeably more moist than traditionally cooked chicken. This works well for people who prefer more tooth resistance or feel uncomfortable with lower temperatures. At 155°F and above, you’re approaching traditional texture, though still with better moisture retention than oven or pan cooking.
I recommend starting at 150°F for your first attempt if you’re nervous about the technique. Once you experience how much better even this temperature is than traditional cooking, you’ll likely want to experiment with 145°F to discover that sweet spot between safety, texture, and juiciness.
Variations That Keep It Interesting
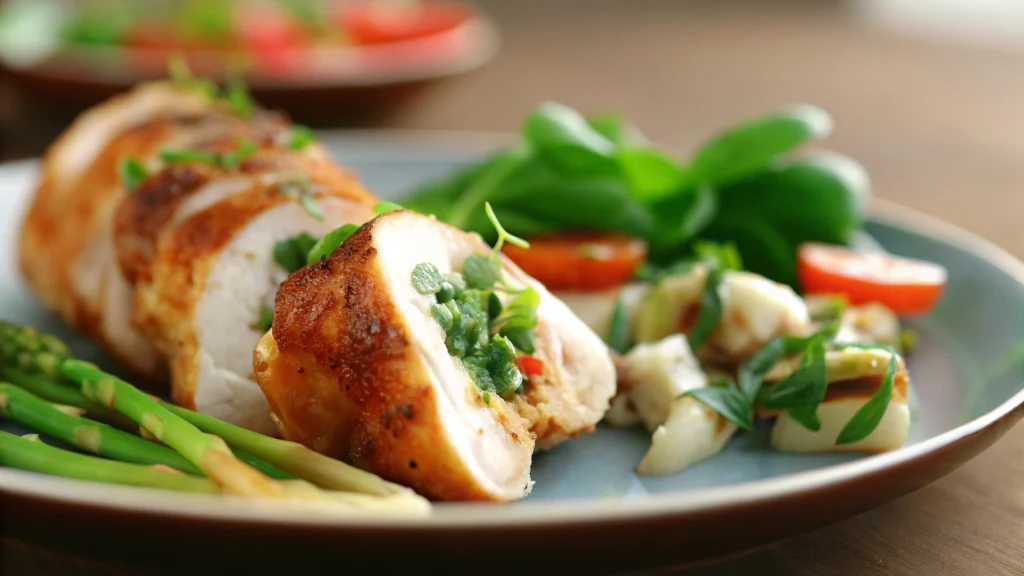
Herb and Garlic Foundation
For a classic preparation that never gets old, add fresh rosemary and thyme sprigs to your bag along with smashed garlic cloves and butter. The sealed environment allows these aromatics to infuse deeply into the meat. The bag juices become an instant pan sauce—after searing your chicken, pour those juices into your hot pan, reduce by half, and finish with additional butter for a restaurant-quality sauce.
Asian-Inspired Ginger Soy
Combine low-sodium soy sauce, thinly sliced fresh ginger, minced garlic, sesame oil, rice vinegar, and a touch of honey in your bag with the chicken. Cook at 145°F for two hours. The result pairs beautifully with rice or makes incredible salad topping. Slice the finished chicken thinly on a bias and garnish with green onions and sesame seeds.
Mediterranean Brightness
Mix chopped fresh oregano and basil with lemon zest, minced garlic, olive oil, and chopped sun-dried tomatoes. This combination creates vibrant, fresh flavors that work perfectly for lighter summer meals. Serve topped with crumbled feta cheese and pair with Greek salad or roasted vegetables.
Avoiding Common Pitfalls
The Searing Step Matters
The most frequent mistake with sous vide chicken breast recipe preparation involves insufficient drying before searing. Water on the surface creates steam, preventing proper browning. After removing chicken from bags, pat it completely dry, then wait a minute or two before searing. That extra time allows surface moisture to evaporate.
Your pan must be genuinely hot—smoking, not just warm. If the chicken doesn’t sizzle immediately on contact, your pan isn’t ready. A proper sear takes only forty-five to sixty seconds per side because you’re just creating surface color and flavor, not cooking the interior. Longer searing actually starts cooking the outer layer again, defeating the purpose of sous vide’s uniform cooking.
Seasoning Requires Adjustment
Flavors concentrate dramatically in the sealed bag environment. Use about twenty-five to thirty percent less seasoning than you would for traditional cooking. This is especially true for salt and aggressive spices. Fresh herbs intensify beautifully, so you can be more generous with those, but dried spices and garlic powder need a lighter hand than your instinct might suggest.
Timing and Safety
Following minimum cooking times ensures both safety and proper texture development. At 145°F, cook for at least ninety minutes for one-inch breasts. Thicker pieces need two hours minimum. These times allow full pasteurization and let the chicken’s texture develop properly. Cooking longer—up to four hours—doesn’t hurt anything within this window.
Meal Prep Mastery
Cooking in Batches
One of the greatest advantages of a sous vide chicken breast recipe approach is how easily it scales. Your water bath can hold multiple bags, allowing you to cook a week’s worth of chicken simultaneously. Prepare four to eight breasts on Sunday, cool them quickly in an ice bath after cooking, then refrigerate in their sealed bags.
These pre-cooked breasts stay perfect for up to four days. When you want to eat, you have options. Reheat in a 140°F water bath for thirty minutes for texture identical to fresh cooking. Or sear directly from cold in a hot pan for three to four minutes per side—this creates a crispy exterior while warming the interior.
The consistent results mean Monday’s chicken tastes as good as Sunday’s. No more progression from acceptable to progressively drier throughout the week. Each meal delivers that same tender, juicy experience you achieved on cooking day.
Your Transformation Starts Now
Mastering a sous vide chicken breast recipe represents more than learning a new technique. It’s about eliminating the anxiety and unpredictability that makes chicken breast such a challenging protein for home cooks. When you cook at precise temperatures for proper times, chemistry takes over. Results stop depending on your attention span, mood, or how distracted you are by other dinner preparations.
This consistency changes meal planning fundamentally. Prep chicken days ahead knowing it will emerge perfectly. Cook a week’s worth on Sunday without sacrificing quality. Serve guests confidently without worrying about timing or doneness. The mental space freed up by removing these concerns makes cooking more enjoyable overall.
The equipment investment pays dividends immediately through better meals and reduced food waste. How much chicken have you thrown away or forced yourself to eat despite being dry and disappointing? That stops when you can deliver perfect results every single time.
Start with the master recipe at 145°F. Cook for two hours. Sear quickly. When you cut into that first breast and see uniform color, feel that tender texture, and taste chicken that’s actually juicy throughout, you’ll understand why people who discover this method rarely go back to traditional cooking.
Then explore temperature variations. Try different seasonings. Discover what works for your palate and preferences. The technique itself is so reliable that experimentation becomes low-risk and fun rather than anxiety-inducing.
Here’s what I want you to do: This week, commit to trying this exactly once. Buy two chicken breasts. Set up your sous vide in the morning before work or errands. When you come home hours later, that chicken will be sitting at perfect temperature, waiting. Sear it quickly and take that first bite. Notice the texture—tender throughout, no dry edges, impossibly consistent. Feel the juiciness that traditional cooking can’t match. Once you experience what chicken breast is supposed to taste like, you’ll never wonder again why your old methods kept disappointing you. Then, and this is important, make it again next week. And the week after that. Because this isn’t a special occasion technique—it’s how you should be cooking chicken breast every single time from now on.
Did You Try Our Recipe ?
There are no reviews yet. Be the first one to write one.