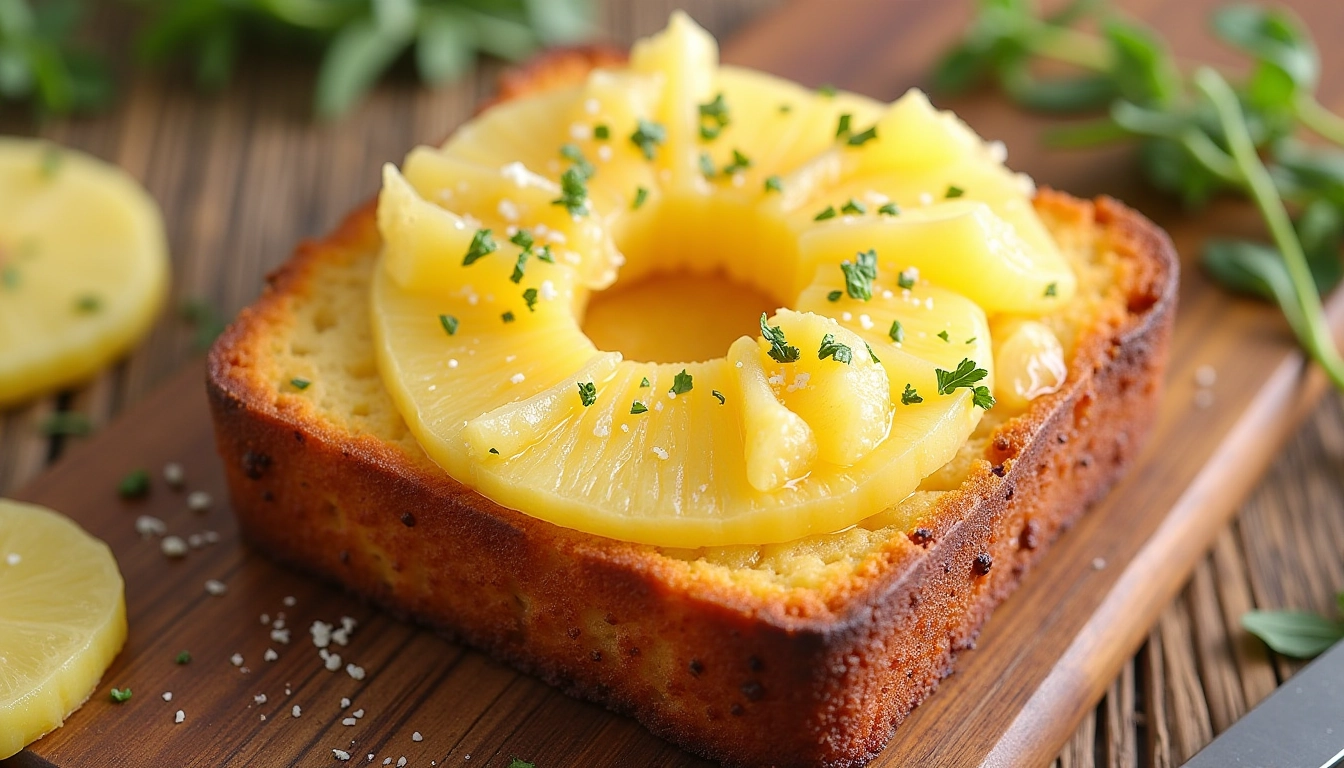
Pineapple Quick Bread Recipe: 8 Moist, Tropical Loaves That Disappear in Minutes
The smell of bread baking transforms any house into a home. Not the yeasty aroma that requires hours of rising and patient kneading, but the sweet, tropical scent of pineapple quick bread—the kind you can have in the oven within ten minutes and filling your kitchen with warmth within the hour.
My grandmother made pineapple bread every Sunday morning. I’d wake to that intoxicating combination of caramelized pineapple, vanilla, and butter wafting through the hallways. She’d slice it while still warm, steam rising as she spread real butter across the golden crumb. Those mornings felt like pure comfort, like the world was exactly as it should be.
Years after she passed, I avoided making it. The memories felt too precious to revisit. Then one rainy afternoon, I found her recipe card tucked inside an old cookbook. Her handwriting—slightly shaky but elegant—listed ingredients in the order she always added them, with little notes in the margins: “Don’t overmix!” and “Best with crushed, not chunks.”
That day, I made my first loaf. The smell transported me instantly, but instead of sadness, I felt connection. She was teaching me again, her wisdom preserved in flour-dusted ink. The bread was everything I remembered—moist, tender, bursting with tropical sweetness that somehow tasted like sunshine and love combined.
Whether you’re honoring your own memories, creating new traditions, or simply craving something delicious, a great pineapple quick bread recipe changes how you think about homemade baking. No mixer required. No complicated techniques. Just simple, reliable comfort that comes together faster than driving to the bakery.
Table of Contents
Why This Bread Belongs in Your Kitchen
The Quick Bread Advantage
Quick breads earn their name from speed and simplicity. Unlike traditional yeast breads that demand hours of rising and careful temperature control, quick breads use chemical leaveners like baking powder and baking soda. You mix ingredients, pour batter into a pan, and slide it into the oven—all within fifteen minutes.
This category of baking emerged in the nineteenth century when baking powder became commercially available. Suddenly, home bakers could create beautiful risen breads without maintaining sourdough starters or kneading dough. The convenience revolutionized home baking, making fresh bread accessible even on busy days.
Pineapple brings unique advantages to quick bread beyond just tropical flavor. The fruit contains bromelain, a natural enzyme that actually tenderizes the gluten structure in your batter, creating an exceptionally soft crumb. The high moisture content keeps your bread fresh for days without drying out. Natural sugars in pineapple caramelize during baking, creating deeper flavor complexity than refined sugar alone could achieve.
Why Homemade Beats Store-Bought
When you bake your own pineapple quick bread recipe, you control every ingredient. No preservatives, no artificial flavors, no mystery additives. You choose the quality of your flour, butter, and pineapple. You adjust sweetness to your preference. You know exactly what you’re eating.
The cost comparison favors homemade by a significant margin. Specialty quick breads at bakeries typically run six to nine dollars per loaf. Your homemade version costs three to four dollars using quality ingredients, and you can make it exactly when you want it rather than settling for whatever’s available on the shelf.
Beyond economics and health, there’s genuine satisfaction in creating something beautiful and delicious with your own hands. The therapeutic process of measuring, mixing, and baking provides a welcome break from screens and stress. When you pull that golden loaf from your oven, you’ve created something tangible and valuable.
Building Your Perfect Loaf
Choosing Your Pineapple
Most successful pineapple quick bread recipes rely on canned crushed pineapple for consistent, reliable results. Fresh pineapple varies dramatically in moisture content and ripeness, making it harder to achieve predictable texture. Canned pineapple is processed at peak ripeness, delivering consistent sweetness and moisture every single time.
Look for juice-packed rather than syrup-packed varieties. The syrup adds unnecessary sugar and creates an overly sweet bread that masks the natural pineapple flavor. An eight-ounce can of crushed pineapple equals roughly one cup, the standard amount for most recipes.
Here’s the critical detail that many home bakers miss: don’t drain that pineapple. The juice contains concentrated flavor and provides essential moisture. When recipes call for crushed pineapple, they typically mean the entire contents of the can—fruit and liquid together. This liquid gold is what keeps your bread impossibly moist for days after baking.
If you prefer using fresh pineapple for a special occasion, select one that’s golden yellow with a sweet smell at the base. Peel, core, and crush or finely dice it, measuring carefully. You’ll need to slightly adjust liquid in your recipe since fresh fruit contains different moisture than canned.
Understanding Your Flour
All-purpose flour creates the most reliable results for your pineapple quick bread recipe. Its moderate protein content produces tender crumb without the density that higher-protein bread flour would create. Most recipes call for two cups, the standard amount for a nine-by-five-inch loaf pan.
Measuring flour correctly matters more than many home bakers realize. When you scoop your measuring cup directly into the flour bag, you compress the flour and end up with significantly more than the recipe intended. This excess flour creates dry, dense bread that lacks the moist tenderness you’re after.
The proper technique involves spooning flour into your measuring cup, then leveling it off with a straight edge. Or better yet, weigh your flour—one cup of all-purpose flour should weigh 120 to 125 grams. This precision might seem fussy, but it guarantees consistent results every time you bake.
For those interested in healthier options, you can replace up to half your all-purpose flour with whole wheat flour without dramatically changing texture. Go beyond fifty percent, and you’ll notice the bread becoming denser and more rustic. Whole wheat adds nutty flavor and boosts fiber content, but it does absorb more moisture, so you might need minor liquid adjustments.
Sweeteners and Their Effects
Sugar in quick breads does more than just add sweetness. It tenderizes the gluten structure, helps the bread brown beautifully, and retains moisture that keeps your loaf fresh longer. Most pineapple quick bread recipes call for three-quarters to one cup of granulated sugar.
You can experiment with different sweeteners to create unique flavor profiles. Brown sugar adds molasses notes and slightly more moisture, creating deeper color and richer taste. Honey or maple syrup contribute distinctive flavors but also add extra liquid—when substituting these, reduce other liquids in your recipe by about a quarter cup.
Coconut sugar offers a lower glycemic index with subtle caramel undertones. It substitutes one-to-one for white sugar with minimal recipe adjustment. For those monitoring sugar intake, you can reduce the amount to as little as one-third cup if you’re using very sweet, ripe pineapple and don’t mind less-sweet bread.
Your Master Recipe
This classic version delivers everything you want in a pineapple quick bread recipe: moist texture, balanced sweetness, prominent pineapple flavor, and foolproof results every single time.
Your ingredient list:
| Ingredient | Amount | Purpose |
|---|---|---|
| All-purpose flour | 2 cups | Structure |
| Granulated sugar | 3/4 cup | Sweetness and texture |
| Baking powder | 2 teaspoons | Primary rise |
| Baking soda | 1/2 teaspoon | Tenderness |
| Salt | 1/2 teaspoon | Flavor enhancement |
| Ground cinnamon | 1 teaspoon | Warmth |
| Large eggs | 2 | Binding |
| Vegetable oil | 1/2 cup | Moisture |
| Vanilla extract | 2 teaspoons | Depth |
| Crushed pineapple | 8-ounce can | Undrained |
| Pineapple juice | 1/4 cup | Extra moisture |
Making it happen:
Start by preheating your oven to 350°F. This temperature provides the perfect balance between cooking the interior and browning the exterior. While the oven heats, prepare your nine-by-five-inch loaf pan by greasing it thoroughly with butter or cooking spray, then dusting with flour. Alternatively, line it with parchment paper for foolproof removal.
Grab two mixing bowls—one large, one medium. In the large bowl, whisk together your flour, sugar, baking powder, baking soda, salt, and cinnamon. This dry mixture can sit while you prepare your wet ingredients, giving the leavening agents time to distribute evenly throughout the flour.
In your medium bowl, lightly beat the eggs just until the yolks and whites combine. Add the vegetable oil, vanilla extract, crushed pineapple with its juice, and additional pineapple juice. Whisk these wet ingredients until everything blends smoothly.
Now comes the crucial step that separates tender bread from tough, dense disasters: pour your wet ingredients into the dry ingredients and stir just until the flour disappears. You’re looking for a thick, slightly lumpy batter. Resist the urge to keep mixing until smooth—those lumps will disappear during baking, and overmixing develops gluten that creates chewy, tough texture with unsightly tunnels running through your bread.
Pour the batter into your prepared pan and slide it into your preheated oven. Set a timer for fifty-five minutes. At this point, insert a toothpick or thin knife into the center. You’re looking for it to come out with just a few moist crumbs clinging to it—not wet batter, but not completely clean either. Those moist crumbs indicate perfect doneness. If you see wet batter, give it another five minutes and check again.
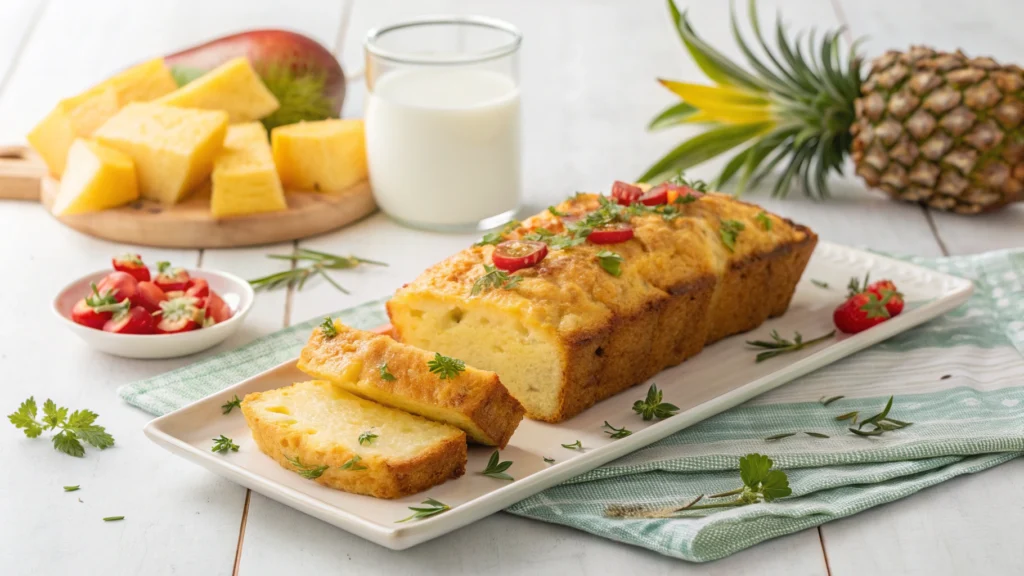
When done, let your bread cool in the pan for ten minutes. This resting period allows the structure to set so the loaf doesn’t fall apart when you remove it. After ten minutes, carefully turn the pan over onto a wire cooling rack. The bread should release easily if you prepared your pan properly.
Let it cool completely before slicing—this takes about an hour. Warm bread cuts messily and gums up your knife. Fully cooled bread slices cleanly into beautiful, even pieces that show off your perfectly moist crumb.
Techniques That Guarantee Success
The Mixing Method Matters
Pineapple quick bread uses what bakers call the “muffin method” of mixing. You combine all dry ingredients in one bowl, all wet ingredients in another, then gently fold them together with minimal stirring. This approach differs dramatically from creaming methods used for cakes, where you beat butter and sugar extensively.
The muffin method protects your bread’s tender texture. When flour combines with liquid, gluten proteins start forming bonds. These bonds create structure, which you need, but too much mixing creates too many bonds, resulting in tough, rubbery bread. Fifteen to twenty gentle folding strokes typically suffice—stop as soon as you no longer see dry flour pockets.
Don’t panic about lumps. A slightly lumpy batter produces better texture than over-mixed smooth batter. Those small lumps hydrate and smooth out during baking without negatively affecting your final product. Trust the process and walk away from the bowl before your instinct to keep stirring takes over.
Temperature and Timing
Your oven temperature directly affects both texture and appearance. At 350°F, you achieve even cooking throughout with beautiful golden-brown color on the exterior. Lower temperatures create pale bread that takes longer to bake, increasing the risk of drying out. Higher temperatures brown the outside before the center finishes cooking, leaving you with raw batter in the middle beneath a dark crust.
Position matters almost as much as temperature. Place your pan on the middle rack where heat circulates most evenly. The bottom rack risks a burnt bottom before the top sets. The upper rack browns the top too quickly while the interior stays underdone.
Baking time typically runs fifty-five to sixty minutes for a standard loaf, but your oven might vary. Start checking around the fifty-minute mark. The bread should be golden brown, pulling slightly away from the pan sides, and spring back when you gently press the center. Most importantly, that toothpick test should show moist crumbs rather than wet batter.
Storage That Maintains Freshness
Once your pineapple quick bread recipe creation has cooled completely, proper storage keeps it moist and delicious for days. Never wrap warm bread—the trapped steam creates condensation that makes the exterior soggy and promotes mold growth.
For short-term storage, wrap your cooled loaf tightly in plastic wrap or aluminum foil, or place it in an airtight container. Stored at room temperature, it stays fresh for three to four days. Avoid refrigerating quick breads, as the cool temperature actually accelerates staling and dries out the crumb.
For longer storage, freezing works beautifully. Wrap your whole loaf or individual slices tightly in plastic wrap, then place in a freezer bag with as much air pressed out as possible. Properly wrapped bread maintains quality for up to three months. Thaw at room temperature for two to three hours, or toast frozen slices directly for best texture.
Troubleshooting Common Problems
When Your Bread Sinks in the Middle
That disappointing crater in your bread’s center typically indicates underbaking. The structure hasn’t fully set before you removed it from the oven, causing the center to collapse as it cools. Next time, bake five to ten minutes longer, even if the top looks done. Remember, the toothpick should show moist crumbs, not wet batter.
Overmixing can also cause sinking. Excessive mixing creates too much gluten structure that rises dramatically in the oven, then collapses as it cools because the structure isn’t strong enough to support itself. Mix gently and minimally to avoid this issue.
Too much leavening creates excessive rise that can’t sustain itself. Measure your baking powder and baking soda carefully—more isn’t better. Old leavening agents lose potency over time, so check expiration dates and replace them regularly.
Dry, Crumbly Texture
Nothing disappoints quite like dry bread when you expected moist, tender slices. Overbaking ranks as the most common culprit. Quick breads continue cooking slightly as they cool, so removing them just when the toothpick shows moist crumbs prevents overdone, dry results.
Too much flour creates dry bread even with perfect baking time. This usually happens when you scoop flour directly from the bag, packing more into your measuring cup than the recipe intended. Use the spoon-and-level method or weigh your flour for accuracy.
Draining your pineapple removes essential moisture. Always use the crushed pineapple undrained unless a recipe specifically instructs otherwise. That juice is liquid gold for maintaining moisture throughout baking and storage.
Dense, Heavy Bread
Dense bread that lacks the light, tender crumb you’re after usually results from overmixing. Those vigorous stirring motions develop tough gluten strands that create heavy texture. Remember—mix just until combined, embracing those lumps.
Old leavening agents lose their potency, failing to create the rise that produces light texture. Baking powder and baking soda gradually lose effectiveness after opening. Test baking powder by dropping a teaspoon in hot water—it should bubble vigorously. Test baking soda by mixing with vinegar—it should fizz immediately. Replace them every six months for best results.
Creating Your Own Variations
Adding Tropical Flair
Transform your basic pineapple quick bread recipe into a tropical vacation by adding shredded coconut. Fold in half a cup of sweetened coconut along with the pineapple, and sprinkle additional coconut on top before baking. The coconut toasts during baking, creating textural contrast and intensifying tropical flavor.
Macadamia nuts take this bread to gourmet territory. Toast three-quarters of a cup of chopped macadamia nuts at 350°F for five to seven minutes until fragrant and lightly golden. Let them cool, then fold into your batter. The buttery richness of macadamias pairs perfectly with pineapple’s bright sweetness.
For adults, a tablespoon of rum extract or actual dark rum adds sophisticated depth without overwhelming the pineapple. This works beautifully when you’re serving the bread as dessert rather than breakfast.
Making It Healthier
Swap half your all-purpose flour for whole wheat flour to boost fiber and nutrients. The bread develops slightly denser texture and nuttier flavor, but remains tender and moist if you don’t exceed that fifty-percent ratio.
Replace half the oil with unsweetened applesauce to reduce fat and calories while maintaining moisture. This substitution works remarkably well in quick breads, though the texture becomes slightly more cake-like and less rich.
Reduce sugar to one-third cup if you’re watching added sugars. The pineapple’s natural sweetness carries the flavor, though the bread will be noticeably less sweet. Consider adding extra cinnamon or vanilla to compensate for reduced sugar.
Greek yogurt can replace some oil while adding protein. Use a quarter cup of plain Greek yogurt in place of a quarter cup of oil. The slight tanginess complements pineapple beautifully while creating exceptionally moist crumb.
Your Baking Journey Begins
A great pineapple quick bread recipe represents more than just another baking project. It’s reliable comfort you can create in minutes and share with people you care about. It’s the aroma that transforms your kitchen into the warmest place in your home. It’s tradition connecting you to memories while creating new ones.
Quick breads welcome imperfection. They forgive slight measurement variations, work with substitutions, and still deliver delicious results. They don’t demand the precision of layer cakes or the timing of yeast breads. They’re approachable, achievable baking that builds confidence with every successful loaf.
Whether you’re baking for weekend brunch, bringing treats to share, or simply craving something homemade and sweet, pineapple bread delivers consistently. The tropical flavors brighten even the grayest days. The moist, tender crumb satisfies without being too rich. And knowing you created it yourself—transforming simple ingredients into something beautiful—brings its own special reward.
Start with the master recipe until the technique becomes second nature. Once you’ve baked it twice, you’ll understand how the batter should look, how it should smell while baking, and exactly what perfectly done looks like. Then start exploring variations that appeal to you. Maybe coconut sounds perfect, or perhaps you’ll try reducing sugar for a healthier version.
Your kitchen is waiting. The ingredients are simple and accessible. The technique is straightforward and forgiving. All that’s missing is your decision to begin.
Here’s what I want you to do: Block out one hour this weekend. Not for scrolling, not for errands, but for baking. Gather your ingredients, preheat that oven, and make your first loaf. As you mix the batter, notice how simple it is. As the bread bakes, let that aroma fill your home. When you slice into that golden loaf while it’s still warm and take that first bite, you’ll understand why generations have treasured recipes like this. Then—and this is the important part—share a slice with someone you care about. Because good food shared is how we show love without words.
Did You Try Our Recipe ?
There are no reviews yet. Be the first one to write one.