Chicken Drumsticks in Oven: The Ultimate Guide to Crispy, Juicy Perfection Every Time
It’s 5:30 on a Wednesday evening. You’re exhausted from work, the kids are asking what’s for dinner, and you’re staring into your refrigerator hoping for divine intervention. There’s a package of chicken drumsticks sitting on the shelf, but the thought of standing over a hot stove or firing up the grill feels like too much.
I’ve been exactly where you are. One particularly chaotic evening, I’d planned to grill chicken, but a surprise thunderstorm forced me back inside. With hungry mouths to feed and no backup plan, I tossed those drumsticks in the oven with whatever seasonings I could grab, set a timer, and hoped for the best.
What came out forty minutes later changed everything. Golden-brown skin so crispy it crackled when I touched it. Meat so tender it practically fell off the bone. And the best part? I’d spent maybe ten minutes actually working while the oven did all the heavy lifting.
That’s when I realized that cooking chicken drumsticks in oven isn’t just a backup plan—it’s actually the smartest way to prepare them. Whether you’re feeding a family on a budget, meal-prepping for the week, or just trying to get dinner on the table without losing your mind, mastering this technique will transform your weeknight cooking forever.
Table of Contents
Why Cooking chicken drumsticks in oven Beats Every Other Method
The Oven Advantage You’ve Been Missing
Let’s talk about why your oven deserves more credit. When you cook chicken drumsticks in oven, you’re working with consistent, surrounding heat that delivers results no stovetop or grill can match. The enclosed environment traps moisture while simultaneously crisping the skin through fat rendering—a combination that’s nearly impossible to achieve through other methods.
Grilling requires constant attention, perfect weather, and the right temperature control to avoid burnt exteriors with raw interiors. Frying means dealing with splattering oil, lingering smells, and adding hundreds of unnecessary calories. Your oven? It maintains steady heat, handles a dozen drumsticks at once, and frees you to handle everything else demanding your attention.
The science backs this up. Research from food scientists shows that oven cooking at 425°F achieves more even heat distribution than most other home cooking methods. Your drumsticks cook uniformly from all directions, preventing those frustrating scenarios where the outside looks done but the inside stays pink near the bone.
From a practical standpoint, drumsticks represent one of the most economical protein choices available. At roughly one to two dollars per pound, you can feed a family of four for under ten dollars. When you master cooking chicken drumsticks in oven, you’re not just learning a technique—you’re gaining a reliable, affordable dinner solution that works every single time.
Health Benefits Without Sacrifice
Here’s something that might surprise you: properly prepared chicken drumsticks in oven can actually be quite healthy. Unlike deep frying, which adds substantial fat and calories, oven baking allows natural fat to drip away from the meat. You’re left with protein-rich food that’s satisfying without being heavy.
Each drumstick delivers about twenty grams of protein with roughly 145 calories when baked. Compare that to fried drumsticks at 245 calories with significantly higher fat content, and the choice becomes clear. The American Institute for Cancer Research notes that oven cooking produces fewer potentially harmful compounds than high-heat grilling or frying, making it a safer choice for regular consumption.
You don’t sacrifice flavor for health benefits, either. The right seasoning and technique create taste that rivals anything from a restaurant kitchen. The key lies in understanding how to maximize what the oven does naturally—render fat, crisp skin, and cook meat to tender perfection.
Essential Techniques for Perfect Results
Selecting and Preparing Your Drumsticks
Your success with chicken drumsticks in oven starts at the grocery store. Look for plump, uniformly sized pieces with intact skin and fresh pink flesh. Size matters more than you’d think—when drumsticks vary dramatically in size, some finish cooking while others remain underdone. Try to select pieces that look similar in thickness and length.
Once home, proper preparation makes the difference between good and exceptional. Remove your drumsticks from the refrigerator twenty to thirty minutes before cooking. This brings them to room temperature, ensuring even cooking throughout. Cold chicken thrown directly into a hot oven often ends up overcooked on the outside while the center near the bone stays undercooked.
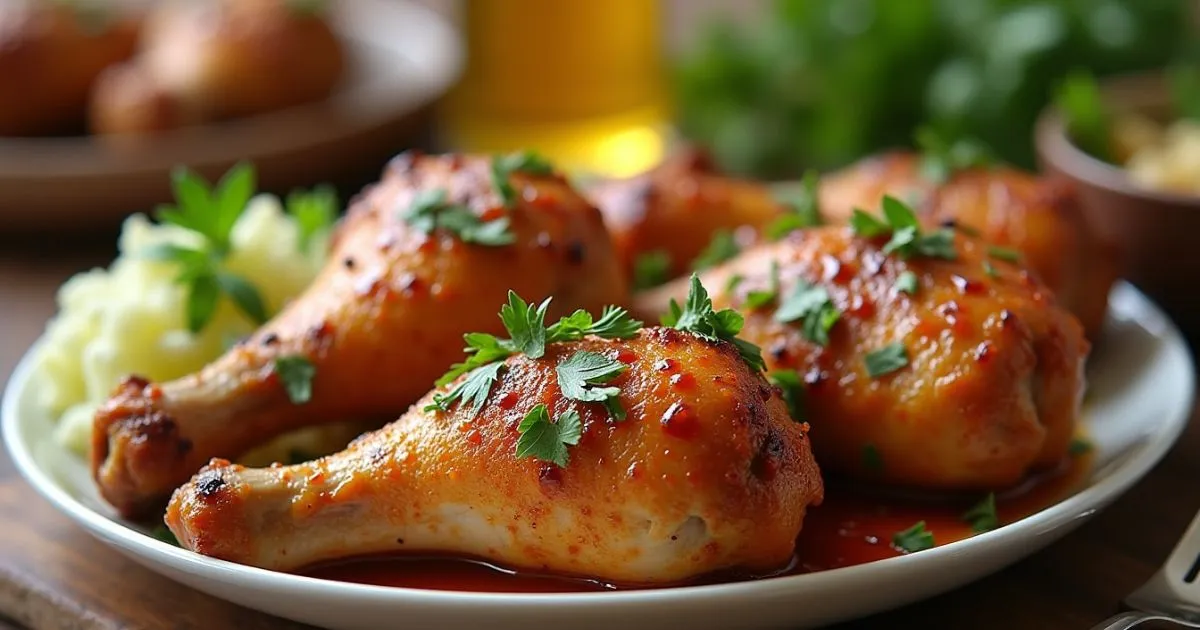
The most critical step that home cooks skip? Drying the skin thoroughly. Grab paper towels and pat every surface of each drumstick until completely dry. Moisture is the enemy of crispy skin. Wet skin steams rather than crisps, leaving you with rubbery, pale chicken instead of that golden-brown crackle you’re after.
For next-level results, score the skin with two or three shallow cuts. This allows fat beneath the skin to render out more effectively while creating extra surface area for seasoning penetration. You’re not cutting into the meat—just making small slashes through the skin itself.
The Temperature Sweet Spot
After testing dozens of batches at various temperatures, I’ve found that 425°F produces the ideal balance of crispy skin and juicy meat. This temperature is hot enough to render fat and achieve serious browning through the Maillard reaction, but not so extreme that the exterior burns before the interior finishes cooking.
Here’s how different temperatures compare when cooking chicken drumsticks in oven:
| Temperature | Time Needed | Result |
|---|---|---|
| 375°F | 45-50 minutes | Tender but less crispy |
| 400°F | 40-45 minutes | Good all-around choice |
| 425°F | 35-40 minutes | Optimal crispy-juicy balance |
| 450°F | 30-35 minutes | Very crispy, requires attention |
At 425°F, you’ll typically need thirty-five to forty minutes total. The exact timing depends on drumstick size and your oven’s accuracy (many home ovens run hot or cold by ten to fifteen degrees). This is why an instant-read thermometer becomes your most valuable tool.
Insert the thermometer into the thickest part of the drumstick, near the bone but not touching it. The USDA requires 165°F for safety, but dark meat like drumsticks actually tastes better at 175 to 180°F. At this higher temperature, the collagen in dark meat has broken down more completely, creating that fall-off-the-bone tenderness everyone loves.
The Wire Rack Secret
Here’s a game-changing tip that separates amateur results from professional quality: use a wire cooling rack set inside your rimmed baking sheet. This simple setup elevates the drumsticks above the pan, allowing hot air to circulate completely around each piece.
Without a rack, the bottom skin sits in its own rendered fat and juices, essentially steaming and staying soggy. With a rack, every surface gets exposed to dry oven heat, creating all-around crispiness that makes flipping unnecessary. You literally set it and forget it—no turning, no babysitting, no hassle.
Line your baking sheet with aluminum foil before placing the rack on top. This catches dripping fat and makes cleanup as simple as tossing the foil when you’re done. Arrange your seasoned drumsticks on the rack with about an inch of space between each piece. Crowding prevents proper air circulation and leads to steaming instead of roasting.
Three Foolproof Recipes to Master
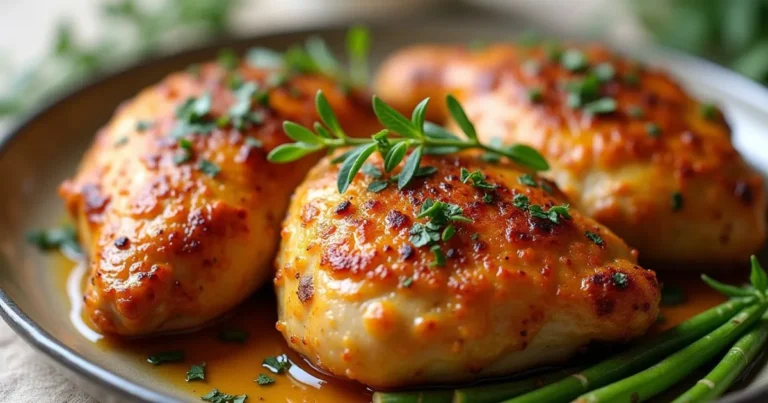
Classic Crispy Perfection
This foundation recipe works every single time. Once you nail this basic technique, you’ll adapt it a thousand ways based on your mood and what’s in your pantry.
What you’ll need:
| Ingredient | Amount | Purpose |
|---|---|---|
| Chicken drumsticks | 12 pieces | Main event |
| Olive oil | 2 tablespoons | Helps seasoning stick |
| Garlic powder | 2 teaspoons | Savory depth |
| Onion powder | 2 teaspoons | Sweet undertones |
| Paprika | 2 teaspoons | Color and mild heat |
| Salt | 1.5 teaspoons | Essential seasoning |
| Black pepper | 1 teaspoon | Freshly ground works best |
| Baking powder | 1 teaspoon | Secret crispiness weapon |
The baking powder deserves explanation. It’s not a mistake—this small addition raises the pH of the chicken skin, helping it brown faster and more thoroughly. It’s the same trick used in restaurant kitchens and creates noticeably crispier results.
Making it happen:
Preheat your oven to 425°F with the rack positioned in the middle. Set up your baking sheet with foil and wire rack as described earlier. Pat those drumsticks completely dry, then toss them in a large bowl with the olive oil until evenly coated.
Mix all your dry seasonings in a small bowl. Sprinkle this mixture over the oiled drumsticks, then toss everything together with your hands. Don’t be shy—really work the seasonings into every crevice and surface. Arrange the seasoned drumsticks on your prepared rack with space between each piece.
Slide the pan into your preheated oven and set a timer for twenty minutes. At that point, rotate the pan 180 degrees to account for any hot spots in your oven. Set another timer for fifteen to twenty minutes.
Start checking internal temperature around the thirty-five-minute mark. When your thermometer reads 175°F in the thickest part of multiple drumsticks, they’re done. Let them rest on the pan for five minutes before serving—this allows juices to redistribute throughout the meat.
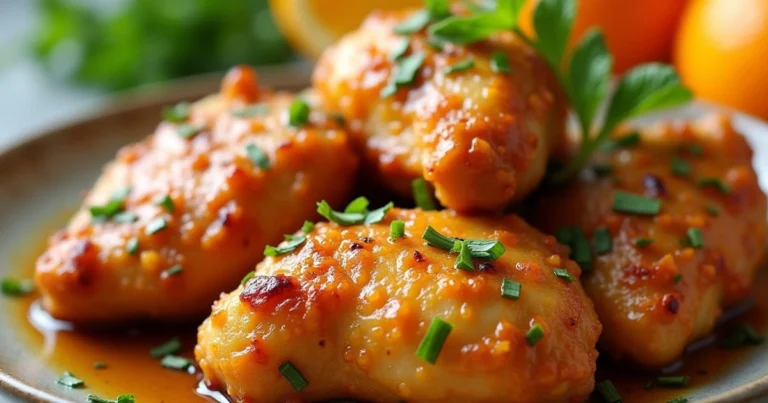
Honey Garlic Asian-Style
When you want something that tastes like takeout but costs a fraction of the price, this recipe delivers. The combination of sweet honey and pungent garlic creates sticky, glossy drumsticks that disappear fast.
Your ingredient lineup:
| Item | Quantity | Flavor Note |
|---|---|---|
| Chicken drumsticks | 12 pieces | |
| Honey | 1/3 cup | Natural sweetness |
| Soy sauce | 1/4 cup | Salty umami base |
| Rice vinegar | 2 tablespoons | Tangy brightness |
| Fresh ginger | 2 tablespoons | Grated, aromatic |
| Garlic cloves | 6 | Minced fine |
| Sesame oil | 1 tablespoon | Nutty richness |
| Red pepper flakes | 1/2 teaspoon | Optional heat |
The process:
Whisk together honey, soy sauce, vinegar, ginger, garlic, and sesame oil in a bowl. Pour about three-quarters of this mixture over your dried drumsticks in a large bowl or zip-top bag. Massage the marinade into the chicken, then refrigerate for at least two hours (or up to overnight for deeper flavor).
Reserve that remaining quarter of the marinade in the refrigerator—you’ll use it for basting and serving. When ready to cook, arrange marinated drumsticks on your wire rack setup. Discard the used marinade (it’s been in contact with raw chicken and isn’t safe to use again).
Bake at 425°F for twenty minutes, then brush with some of the reserved marinade. Continue cooking for another fifteen to twenty minutes, basting once more halfway through. The honey will caramelize beautifully, creating that glossy finish you see in restaurants.
Garnish with sliced green onions and toasted sesame seeds before serving. The contrast of sweet, salty, and tangy flavors makes these chicken drumsticks in oven incredibly satisfying.
Lemon Herb Mediterranean
This version proves that healthy can be absolutely delicious. Fresh herbs and bright lemon create flavors that feel lighter without sacrificing satisfaction.
What goes in:
| Ingredient | Measurement | Mediterranean Touch |
|---|---|---|
| Chicken drumsticks | 12 pieces | |
| Olive oil | 3 tablespoons | Quality matters here |
| Fresh lemon juice | 1/4 cup | Two lemons worth |
| Lemon zest | From 2 lemons | Concentrated flavor |
| Fresh rosemary | 2 tablespoons | Chopped fine |
| Fresh thyme | 2 tablespoons | Leaves stripped |
| Garlic cloves | 6 | Minced |
| Sea salt | 1.5 teaspoons | Coarse preferred |
| Black pepper | 1 teaspoon | Cracked |
Bringing it together:
Combine olive oil, lemon juice, lemon zest, rosemary, thyme, garlic, salt, and pepper in a large bowl. Add your patted-dry drumsticks and toss until every piece is thoroughly coated with the herb mixture. You can cook immediately or marinate up to four hours for more intense flavor.
Arrange on your wire rack and bake at 425°F for thirty-five to forty minutes, checking internal temperature to confirm doneness. The herbs will become fragrant and slightly crispy, while the lemon provides brightness that cuts through the richness of the chicken.
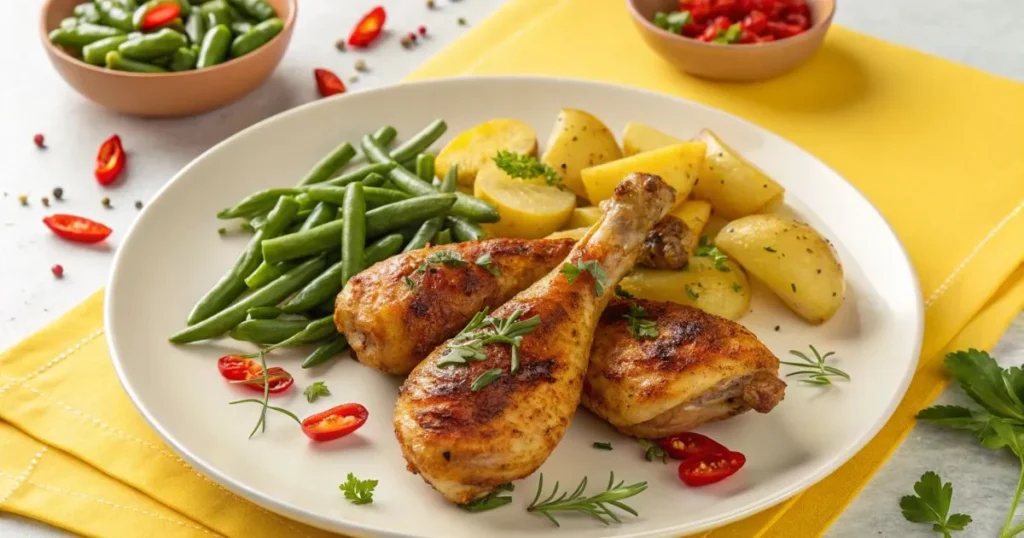
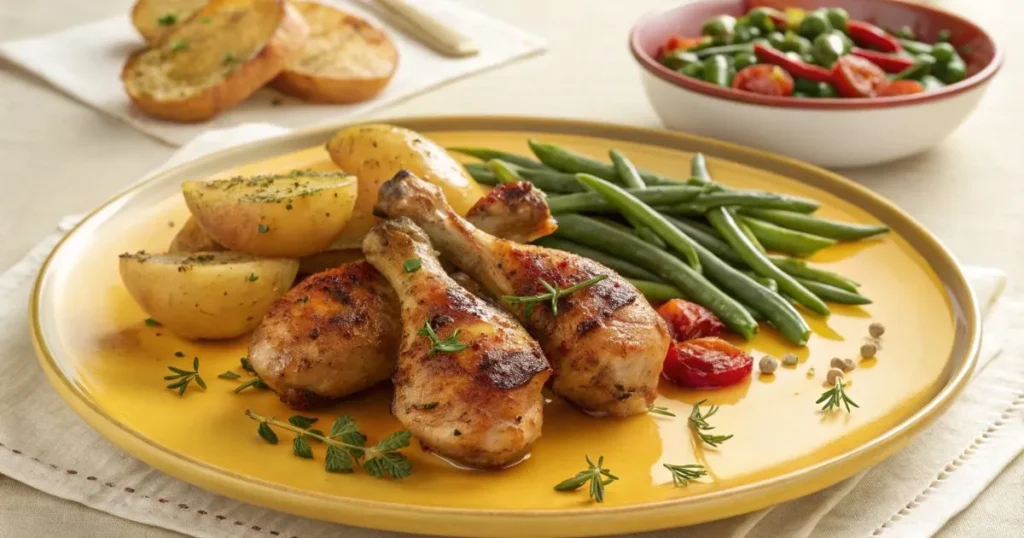
This recipe works beautifully with roasted vegetables cooked alongside the drumsticks. Toss quartered potatoes, halved Brussels sprouts, or thick-cut carrots in a bit of the same herb mixture and spread them on the baking sheet beneath the wire rack. They’ll roast in the drippings while the chicken cooks—dinner and sides done simultaneously.
Avoiding Common Mistakes
The Errors That Ruin Results
Even with straightforward cooking like chicken drumsticks in oven, certain mistakes can sabotage your success. Understanding what not to do matters as much as knowing the right technique.
Opening the oven door repeatedly ranks as the most common error. Each time you open that door, you drop the internal temperature by twenty-five to fifty degrees. This extends cooking time and creates uneven results. Use your oven light to check progress, and only open the door when rotating the pan or checking temperature near the end of cooking.
Crowding the pan comes in a close second. When drumsticks touch each other or sit too close together, they steam rather than roast. That moisture trapped between pieces prevents the skin from crisping properly. Always leave at least an inch of space between drumsticks. If you’re cooking for a crowd, use two pans or cook in batches rather than cramming everything together.
Skipping the thermometer leads to guesswork that often results in overcooked, dry chicken or undercooked, potentially unsafe meat. Visual cues help, but only a thermometer tells you exactly what’s happening inside the thickest part of the meat. Digital instant-read thermometers cost fifteen to thirty dollars and last for years—it’s one of the best investments you’ll make in your kitchen.
Storage and Reheating Wisdom
Properly stored, your cooked chicken drumsticks in oven stay good in the refrigerator for three to four days. Let them cool completely before transferring to airtight containers. Never store hot chicken directly—rapid cooling prevents bacterial growth.
For longer storage, freezing works beautifully. Wrap individual drumsticks in plastic wrap, then place several in a freezer bag. This method lets you grab exactly how many you need without thawing an entire batch. Properly wrapped drumsticks maintain quality for three to four months in the freezer.
Reheating requires care to avoid drying out your chicken. The oven method works best: place drumsticks on a wire rack over a baking sheet at 350°F for fifteen to twenty minutes. Loosely cover with foil to retain moisture while the meat warms through. An air fryer also excels at reheating, taking just eight to ten minutes at 375°F and re-crisping the skin beautifully.
Avoid the microwave if possible—it makes skin rubbery and can create tough, dry meat. If you must microwave for convenience, place a damp paper towel under the drumsticks to add moisture, and heat in thirty-second intervals to prevent overcooking.
Making It Work for Your Life
Meal Prep That Actually Helps
Cooking chicken drumsticks in oven fits perfectly into meal prep routines. Double your recipe on Sunday, cooking twenty-four drumsticks instead of twelve. Portion them into individual containers with your chosen sides—roasted vegetables, rice, or salad work well. You’ve just created grab-and-go lunches or quick dinners for most of the week.
The budget-conscious among you will appreciate how far drumsticks stretch. At peak pricing, you might pay two dollars per pound, but sales frequently drop prices to ninety-nine cents or less. Stock up during these sales, freeze what you won’t use immediately, and you’ve got affordable protein ready whenever you need it.
For entertaining, drumsticks shine as finger food that’s easy to eat while standing and socializing. Prepare two or three different flavor profiles—classic, spicy buffalo-style, and honey garlic, for instance. Arrange them on platters with small dishes of dipping sauces, and watch them disappear. Plan on two to three drumsticks per guest, and you’ll have just the right amount.
Your Next Steps
Mastering chicken drumsticks in oven gives you more than just a recipe—it provides confidence that you can put quality food on the table consistently without stress or complicated techniques. These aren’t fancy chef skills requiring years of practice. They’re straightforward methods that work reliably once you understand the principles.
Start with the classic recipe. Cook it twice to cement the technique and timing in your mind. Then experiment with different seasonings based on what sounds good or what’s already sitting in your spice cabinet. You’ll quickly develop your own variations that your family requests by name.
The beauty of this cooking method lies in its flexibility. Busy weeknight? Ten minutes of prep, then walk away. Weekend with more time? Marinate for deeper flavor development. Feeding picky kids? Stick with mild seasonings they know. Cooking for adults who love bold flavors? Pile on the spices and heat.
Your oven has been waiting patiently to make your life easier. All it needed was for you to learn the right approach and give it a chance to prove what it can do.
Here’s your challenge: Pick up a package of drumsticks this week. Set aside forty-five minutes on an evening when you’re home. Follow the classic recipe exactly as written. When you pull that first tray of golden, crispy drumsticks from your oven and taste how juicy and flavorful they are, you’ll understand why this method has become my go-to solution for quick, satisfying dinners. Then come back and try the other recipes—your weeknight dinner rotation will never be the same.
Did You Try Our Recipe ?
There are no reviews yet. Be the first one to write one.